Computers
Color Printing
🖨️ Setting Up Authentication for Color Printing
To print in color on the office copier, you need to set up user authentication. This guide will walk you through the process step by step.
⚙️ Setup Instructions
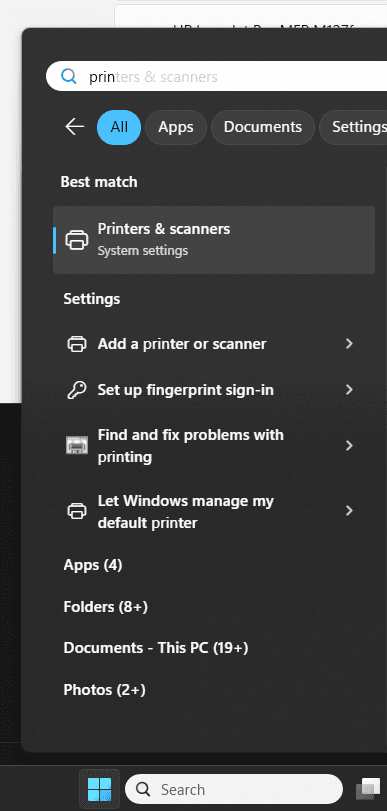
Step 1: Open the Printers & Scanners Configuration
- Click on the Start button 🪟
- Type Printers in the search box
- Open the Printers & scanners app
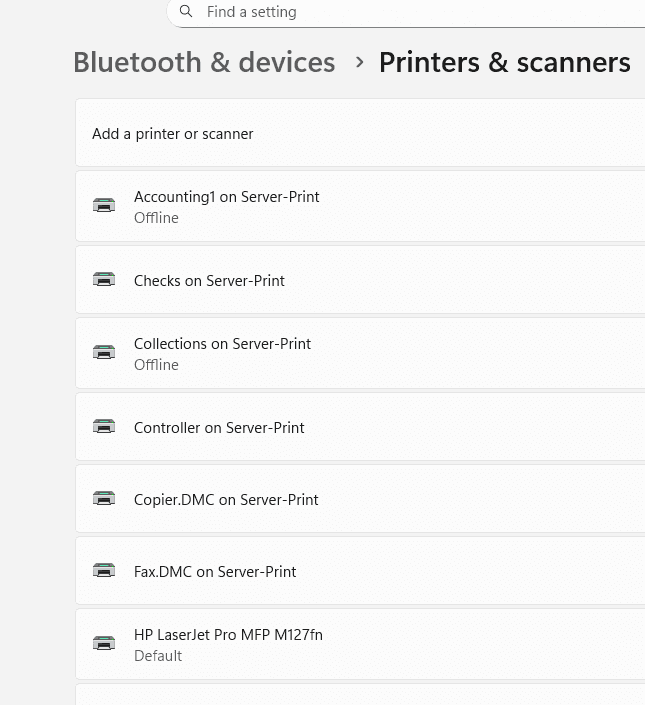
Step 2: Select the Correct Printer
- Select the correct printer from the list. Generally, only the copiers have color printing capabilities 🎨
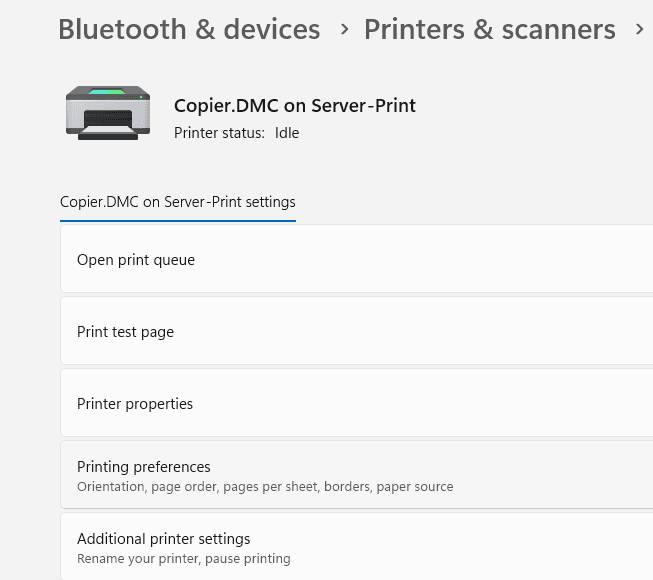
- Click on Copier.REGION on Server-Print
- Click Printing preferences
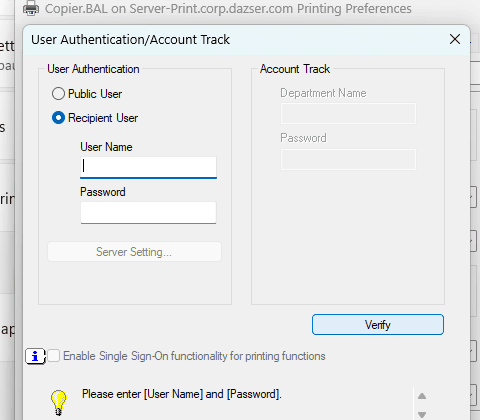
Step 3: Configure User Authentication 🔐
Set up your user credentials for the copier to enable color printing.
- Select the Basic tab from the top of the new window
- Click Authentication/Account Track...
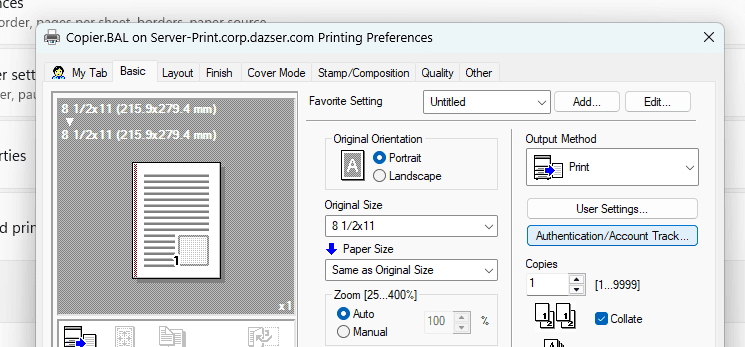
- Select Recipient User under the User Authentication section
- Enter your assigned username and password 📝
- Click Verify to confirm your credentials are correct ✅
- Click Apply or OK to save the settings
🧪 Testing Your Setup
After completing the authentication setup:
- Try printing a color document 📄
- Your credentials should now be saved for future color printing
- The document should print in color! 🌈
🛠️ Troubleshooting
Common Issues
- ❌ Authentication fails: Verify your username and password with IT support
- ⚫ Only black and white printing: Check that color is selected in print preferences when printing a document
- 🚫 Printer not found: Ensure you're connected to the office network
📞 Need Help?
If you continue to experience issues, contact IT support for assistance with your specific username and any error messages you encounter.